How to Block USB Devices on Windows 11
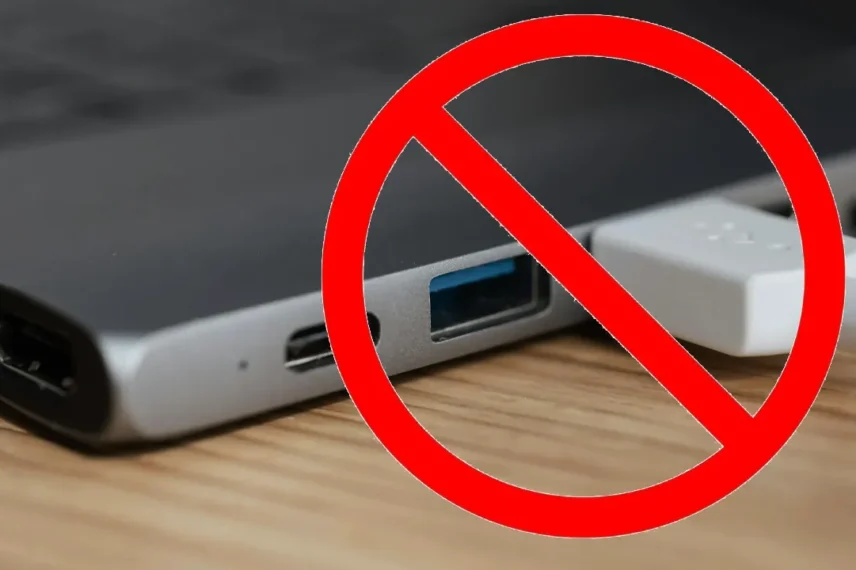
If you prefer not to use any USB devices or USB storage devices, you can disable the USB ports on your computer. In Windows 11, there are two methods to achieve this: a graphical method and a command-line method via Powershell.
Why would you want to block USB Devices ?
Blocking USB devices on Windows 11 can be a useful security measure for several reasons. One major concern is the risk of malware transmission via USB devices, which is a relatively common occurrence. Additionally, disabling USB devices can also prevent unauthorised data transfers, such as someone attempting to copy sensitive files to or from your computer. A notable example of a malicious USB tool is the USB Rubber Ducky, a device specifically designed to steal data!
If you don’t use any USB devices with your machine, it makes sense to keep the ports disabled, since this also prevents other users from using these ports on your computer. You can unblock any USB ports you want on your computer.
Block All USB Devices Using Device Manager
If you wish to disable all USB ports, preventing any USB devices from functioning with your system, you can use the Device Manager utility. Please note that this method will also disable any USB-enabled mice or keyboards, so it is essential to have an alternative control method set up beforehand to avoid any issues.
To begin, launch Windows Search (press Windows+S), type ‘Device Manager’, and open the utility. Expand the ‘Universal Serial Bus Controllers’ section, right-click a USB port in the list, and select ‘Disable Device’. When prompted, click ‘Yes’.
Repeat the step for each USB port in the list until all of them have been disabled.
Once you’ve completed this process, any device connected to a USB port on your machine will no longer be recognised by your system. If you need to re-enable your USB ports in the future, simply open Device Manager, expand the ‘Universal Serial Bus Controllers’ section, right-click each port on the list, and select ‘Enable Device’.
Block USB Storage Devices From PowerShell
If you prefer using command-line methods, you can use a PowerShell cmdlet to block all USB storage devices on your PC. Note that this method will not affect other devices such as keyboards and mice, which will continue to function as normal.
To begin, open Windows Search (press Windows+S), type ‘PowerShell’, and select ‘Run as Administrator’. When prompted by the User Account Control, click ‘Yes’.
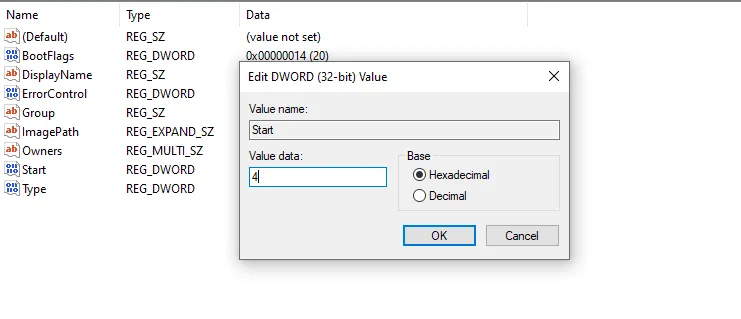
In the PowerShell window, type the following cmdlet and press Enter. This cmdlet will modify a value in the Windows registry, preventing USB storage devices from working with your machine.
Set-ItemProperty -Path "HKLM:\SYSTEM\CurrentControlSet\Services\USBSTOR" -Name "Start" -Value 4After running the cmdlet, restart your Windows 11 PC to apply the changes.
If you need to re-enable USB storage devices on your PC in the future, you can do so by running the corresponding command that is below in PowerShell.
Set-ItemProperty -Path "HKLM:\SYSTEM\CurrentControlSet\Services\USBSTOR" -Name "Start" -Value 3Remember : restart your pc after running the command.
Block USB Storage Devices Using Group Policy Editor
If you’re running Windows 11 Pro, you can utilise the Local Group Policy Editor tool to block USB storage devices. Please note that this tool is not available in the Home edition of Windows 11.
To access it, press Windows+R to open the Run dialog box, then type the following command and click ‘OK’ or press Enter:
gpedit.mscIn the Local Group Policy Editor window, use the options on the left-hand side to navigate to the specified path. Then, in the right-hand pane, locate the item labelled “All Removable Storage Classes: Deny All Access” and double-click it.
Computer Configuration > Administrative Templates > System > Removable Storage Access
Once there double click “All Removable Storage classes: Deny all Access ” and choose “Enabled” then “Apply” followed by “OK”
To unblock USB storage devices in the future, double-click the “All Removable Storage Classes: Deny All Access” entry, select “Not Configured”, and then click “Apply” followed by “OK”. Finally, restart your computer to apply the changes.
Block USB Storage Devices Using Registry Editor
You can modify a value in the Windows registry to disable or enable USB storage devices. This method is compatible with both the Pro and Home editions of Windows 11.
To begin, launch Run by pressing Windows+R. Type the following in the box and select “OK” or press Enter:
regeditSelect “Yes” in the User Account Control prompt.
In Registry Editor, navigate to the following path:
HKEY_LOCAL_MACHINE\SYSTEM\CurrentControlSet\Services\USBSTORIn the right-hand pane of Registry Editor , double-click the item labelled “Start”. In the window that opens, click in the “Value Data” field and enter the value 4. Then, click “OK”. Setting the value to 4 instructs Windows to ignore any connected USB storage devices.
Close the Registry Editor and restart your PC to apply the changes.
To reverse this change and re-enable USB storage devices in the future, navigate to the same path in the Registry Editor, double-click the “Start” entry, enter 3 in the “Value Data” field, click “OK”, and then restart your PC.
Recent Posts
- Important Changes to Google reCAPTCHA in 2025: What You Need to Know

- Unlock macOS 26 Tahoe: Must-Have Features Today- (using third party apps)
- How Does Cryptocurrency Work? A Beginner’s Guide
- Vintage Wedding Cars for Hire: Timeless Elegance for Your Special Day
- The Best Wedding Venues in the West Midlands: A Comprehensive Guide


Comments